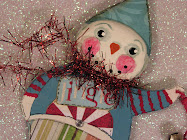
My spring coffee cup is going to tell a little story......
This chicky had a great Easter Sunday!
I got up early and hopped to the studio to make fabric beads and drink Duncan Donut coffee.
 After dinner I waddled to the back porch and sat in the sun! The End.

How perfect is this tulip with the fresh dew still on it?


I got up early and hopped to the studio to make fabric beads and drink Duncan Donut coffee.
 After dinner I waddled to the back porch and sat in the sun! The End.
How perfect is this tulip with the fresh dew still on it?

Ok, now onward to the fabric beads. I made two sizes, 1 inch long and 1/2 inch long. If you'd like 1 inch long beads then cut your fabric strips one inch wide. Then cut them 7 inches long. I use a quilting ruler, self healing cutting mat and a rotary cutter.


Oh yah! Gel medium. How much of this stuff do I use? A lot, that's all I'm going to say. I should really bite the bullet and buy the gallon jar of it for $65! You are going to use the gel medium to glue and wrap the beads and seal off the ends.
Mmmmmmmm, just look at these lucious batiks. Great colors!

Go the the dollar store and buy a bag of bamboo skewers to wrap the fabric around. Grab a very small paint brush too while you're at the dollar store.


Go the the dollar store and buy a bag of bamboo skewers to wrap the fabric around. Grab a very small paint brush too while you're at the dollar store.
To make the bead, grab a strip of fabric start to wrap it around the skewer, give it 2 full wraps (do not wrap too tight!!!! check to see if you can move it up and down the skewer) then dip your paint brush into the gel medium and dab some on the inside of the fabric and continue to do 2 more full wraps......dab on more gel medium. Keep doing this until you get to the end of the fabric. Dab a generous amount of the gel meduim on the endof the fabric and then smooth it down with your finger (don't leave a gob of it, smooth it out).
Let the beads dry for about 45 mintues. Pull them off of the skewer. Trim off any rougue threads and then using your little paint brush dab a small amount of gel medium on each end of the beads to keep them from unraveling. Let them dry. Now you're ready to use them in all kinds of beading projects! I'll be posting some projects using them soon. They are time consuming but worth it!
Hope you all had a great weekend and super Monday!




 Posts
Posts