Digital Elements in the blog header from Hidden Vintage Studios and Holliwood Studios @ DeviantScrap.com

Tuesday, November 30, 2010

12 Days of Christmas Gum!

So Day #5 in the 30 Days of Holiday Give Aways was suppose to be a template for this sleeve to go over the pack of gum, however my scanner was not cooperating the way it should so I'll just give you the easy instructions. You know they just estimated how much the 12 presents from the 12 Days of Christmas song would cost this year and it was a whopping $97,000 dollars. I have a much cheaper version...........the 12 Days of Christmas Gum which will cost you all of $1.19!
Take a pack of Dentyne Ice gum and slide the sleeve off of it. Carefully pry it apart at the seam, flatten it out onto a piece of colored cardstock and trace around it. Cut it out and score the lines where you would fold it. Glue some colorful snowmen on the front. Fold and using a scrapbooking tape runner, tape up the side tabs by overlapping them. Using a thick Sharpie marker write the numbers 1-12 on the back of the gum. Tuck the pack of gum into the sleeve and write "to" and "from" on the back of the sleeve and ta-da, you are done! Now you can whip up a bunch of these babies for your friends, your kid's teachers (they chew a lot of gum, it helps with their jaw clenching), etc.....
You know you could even stick 2 sleeves together and turn it into "Advent Gum"!

Monday, November 29, 2010

Free Santa Tags

Hey, happy Monday! It's Day #4 in the 30 Days of Holiday Give Aways here at Honey Girl Studio. I love the Christmas images from the 1950s and 1960s and I gravitate toward that look in my art. My friend Tracy calls it "kitchy" so I guess I should start saying "Merry Kitchmas"! These Santas have so much personality. Please feel free to use them in your art work or as tags for gifts. They'd even look good in the middle of paper rosettes as an ornament or perhaps as place cards. Have fun and be creative with them!

Sunday, November 28, 2010

Snowman Jingle Zipper Pulls Give Away.....

Hey everyone it's day #3 in my 30 Days of Holiday Give Aways! It sure was cold here this weekend and the cold weather inspired me to create a a few snowman zipper pulls. Oh and did you notice, I broke out the Christmas tunes?????

An added bonus of these little guys is that they jingle! I've got 6 of these babies to give out. Here's the skinny on how to snag yourself one. The first 3 NEW followers to post a comment will receive one. If you are a new follower don't forget to leave and email or link where I can reach you. And, the first 3 people that are ALREADY followers to post a comment will also get one. Wheeeeewwwww-whoooooooo!!! (sing to the tune of Jingle Bells) Jingle pulls, jingle pulls, zip up to your chin....

Don't forget to spread the word about my 30 Days of Holiday Give Aways on your blog! The more the merrier!

If you don't win one, they are easy to make. Email me and I'll send you the directions!

Ok, I've gotta go get ready the give away for tomorrow! G-night!

Saturday, November 27, 2010

Christmas Give Away!

In the meadow we can build a snowman........... Well, maybe "sculpt" a snowman! Last weekend I went to visit my best crafting friend Tracey (Glitterbug Studios) and we spent the day together crafting, laughing and running around. This guy is a little snowman assembly that I made to take to show her. The base is a wooden candle stick with a mercury glass blue votive candle holder turnd upside down and glued on with E-6000. The head was sculpted with paperclay.

We put all of our creations on a table in her studio. I love her Eiffel tower and Peace Wreath.

Yesterday I got to bead a little bit and created this multistrand bracelet. I must have been channeling the peace sign wreath from last weekend! Lastly, here is the free-bee for today. It's a CD cover which mesures 5 by 5 inches. Every year I burn a new Christmas CD with various favorites and design a cover. This is the one for this year. Leave a groovy comment and your are entered into the CD give away. If you're a follower, you'll double your chances to win. I'll pick a winner on Wednesday. Good luck!

Thursday, November 25, 2010

Free Candy Cane Fairy

I've changed the name of today, better known as "black Friday" to "Candy Cane Friday"! While I applaude the shopping intestinal fortitude of those who venture out into the malls of America on this wonderful Friday, I, myself do not have such shopping resolve, therefore I'm hanging at home and going to my mom's house to finish the outside decorating.

And so begins the countdown to Christmas! This little guy is the Candy Cane Fairy that I created. Please feel free to use him in your artwork, athough he is not for resale on a CD or collage sheet.

I'm working on a new set of 4 Christmas postcards and here is one of them using the above image. If you create something with the Candy Cane Fairy, I'd love to see it!

Happy Thanksgiving!

Happy Thanksgiving to all my friends in blogland! I'm thankful for my wonderful husband and family and creative friends. Thanks to all who visit my blog and leave such nice comments! Tomorrow starts the 30 day countdown to Christmas. I'm going to post everyday for the next 30 days. Thoughout these posts will be awesome giveaways so check back everyday! Ok, now get outta here and go eat some more pie then take a long nap. :-)

Sunday, November 14, 2010

Something Glittery......

There's something sparkly going on at the Honey Girl Studio............
Something round and scalloped..........


Something delightfully frilly without being too frou-frou............Something called a paper wreath! How cool did this wreath turn out? If you would like the steps on how to make it go to Enchanted Rose Studio. Tina has a really nice tutorial with pictures. I followed her directions and it was pretty easy. The next one I make I'm going to glue in little red and silver glass balls. I didn't glitter every circles' edge mainly because I was too impatient and wanted to get it together!


I actually made 2 wreaths this weekend. I'm getting into the Christmas mode. I like the simplicity of this wreath. I'm finding that as I get older I like more simple, pared down things. I really like the white/silver/winter white combo and I'm considering doing my mantel in that scheme this holiday season.
I used a styrofoam wreath base and wrapped it with cotton batting then I cut strips of white linen and wrapped it around it followed by white ric-rac.

The little acrylic snowflakes and shell buttons are secured with pearl head pins.

Hope you all had a fantastic weekend!

Thursday, November 11, 2010

Christmas in Paris

This week in Western Pa has been beautiful, warm and sunny days of about 65 degrees and cold frosty nights of 32 degrees. The cold nights have got me thinking about Christmas decorations. I created a template for this Eiffel tower and created it from chipboard and decorative papers. Hmmmmmm, kind of makes you wonder what Christmas in Paris would be like.

I think the tiny bottle brush tree is so cute!


What Christmas Eiffel tower would be complete without a snowman?

The tower measures about 7 inches tall.
NOEL!

Sunday, November 7, 2010

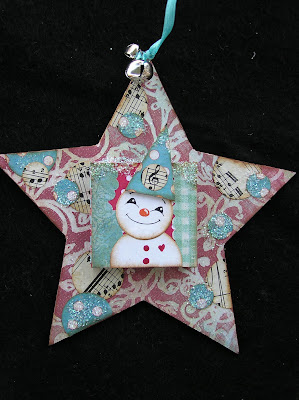
Ornaments Anyone?

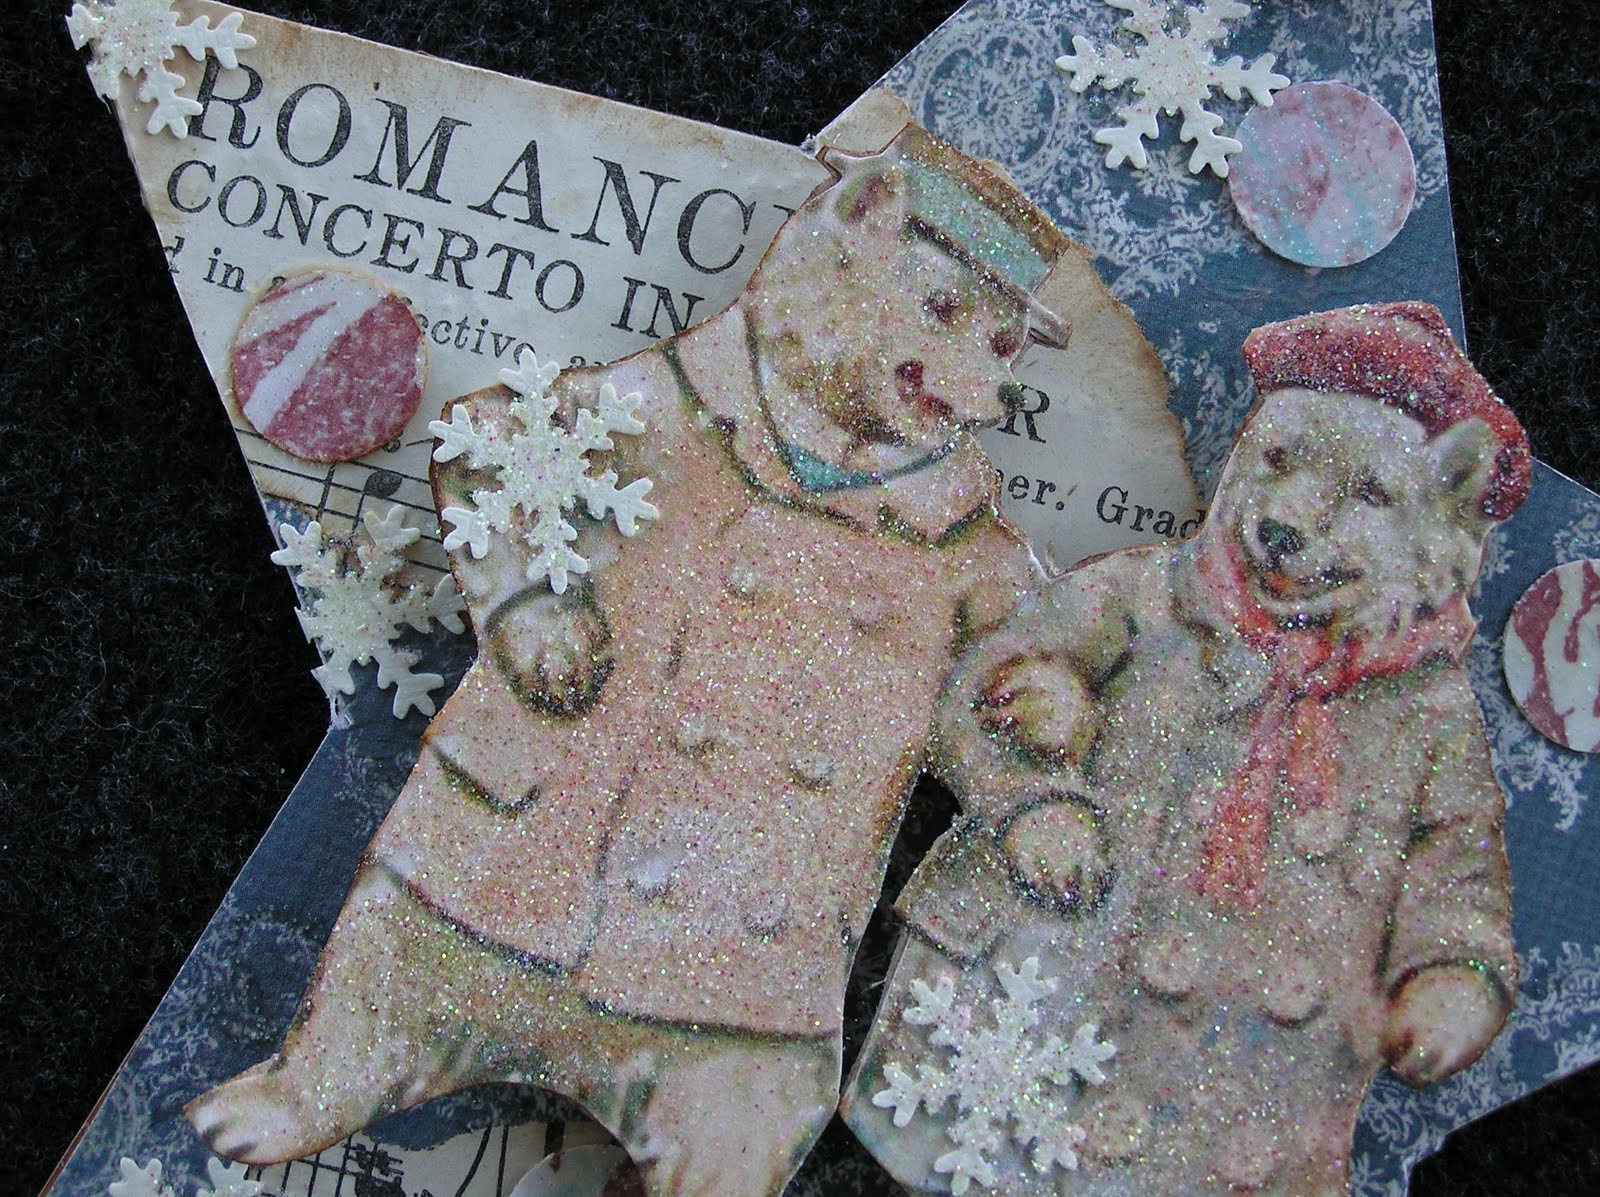
I've been in somewhat of a creative funk for the past few weeks. I'm sure you all have had periods of time where you just couldn't get into the artsty swing of things. Well, this morning I work up bright eyed a bushy tailed at 6:15, went into my studio and started to create! The funk has been broken! Perhaps it had something to do with the time change? I had chipboard stars and decided to turn them into ornaments......It's hard to tell in the photos but the bears and snowflakes are covered in a beautiful ultra fine glitter. I had a piece of sheet music from 1919 and the title of the song was "Romance" so I tore it off to use on this ornament as it just seemed to be perfect. The bears are raised off of the star by about 1/4 of an inch.
This little guy is holding a shiny silver bell, ringing in the holiday season. He is also raised off of the star by 1/4 of an inch. A Scrabble tile and piece of vintage lace round out the ornament.

Hark the Winter Angel Sings! I tied in the basket of lillies she's carrying into the theme. Sewn to the vintage lace are 2 bisque calla lillies and a teal colored pearl all lightly dusted with ultra sepia glitter. The star has also been covered with the glitter.

Now you know I couldn't create ornaments without sticking a bird in somewhere! This one was created on an old CD for the base.


Rememeber the mini CDs that never quite took off? Well I found one and turned it into a little ornie. These three bears remind me of "Three's Company".....come and knock on our door.......we've been waiting for you. I'm going to name them Jack, Krissy and Janet.

My best crafting friend, Tracey says that I have a "kitchy" side to my art and she's right! I like to get whimsical from time to time so here are 2 in that category.....
You know, they always have "sister" and "friend" ornaments but what about a "cousins" ornaments? We all have a favorite cousin, right?

Sunday, October 31, 2010

Happy Halloween

Happy Halloween!
Hope all my friends in blogland had a terrific candy-bar packed Halloween!
This is "Boo" my newest little paperclay leopard doll......

Sunday, October 24, 2010

It's Snowing Men......Snowmen that is.....

Since Halloween is almost here it's time to switch to gears. The frosty nights speak of impending flakes......snowflakes that is not your visiting relatives! Tracey at Glitterbug Studios and I decided to challenge each other to make a snowman and do a cross-blog posting.

Let me introduce to you......Mitten. Tracey made this fabulous man with vintage appeal! He's all ready to go out caroling. Isn't he cute? To see more pics of Mitten head on over to Glitterbug Studios. She is becoming quite the Paperclay maven! I love the little "coal" eyes. Mitten measures 15 inches high.


Now, let me introduce you to my little snowguy.......please say "hello" to Sugar. Sugar is made out of cream colored felt. His eyes and mouth are french knots and his nose was embroidered with a straight stitch with DMC floss. I lightly dusted the top of his head and cap with coarse white glitter. He measures 12 inches tall. I was inspired to make Sugar by this glass jar full of yummy Christmas goodies. Isn't it funny how you can get an idea just by looking at a jarful of randomness?
So onward to the pattern. Now remember you can copy and save this pattern for your own use and even make little snowmen to sell, shoot you can even resize it and make little itty bitty ones or giant ones, but please don't sell the pattern because that would be very uncool and bad karma would then come your way in the form of every snowman that you try building this winter looking like a big pile of crap, and I really wouldn't want that for any of my friends in blogland!
So you're asking right about now, "where are the instruction Melissa?" I would never leave you hanging like that! Just to let you you know, I used a sewing machine with Ecru colored thread but you could just as easily hand sew too. You will be sewing on the front of the pieces which means there is no turning of things right side out!
Cut 2 bodies, 4 legs and 4 arms and 2 hats out of felt. Making french knots put on the eyes and mouth and using a straight stitch make a nose using DMC floss. Next cut out 2 little red circles and attach them to the front of the body using french knots. Pin together 2 legs and sew around the outside of them, repeat for the other leg. If you'd like use red DMC floss and a chain stitch to add stripes on his legs. Sew the arms the same way. Pin together the 2 bodies and tuck the two legs into the bottom of the body and stitch right over the legs to hold them on. Continue to stitch around the outside of body about 1/4 of an inch in from the edge and leave about a 2 inch opening on the one side to put the stuffing in (I use Polyfill). Sew the hat and put just a little stuffing in it. Lightly stuff the snowman and hand stitch up the opening. Hand sew the arms on each side. Hand sew the hat on the head at a jaunty angle. Embellish with whatever you want to add on to him!
If you make one of these babies, I'd love to see it! Send me pic and I'll put it in a future blog posting with a link to your blog. Happy Snowman making! This is a great way of making a snowman without getting your hands cold!

Monday, October 18, 2010

Fairy Door Necklaces.....

Again, the falling leaves have inspired me in my newest creations........ fairy door necklaces. The leaves are made of leather and the doors are metal. The coolest thing about the doors (other than them being so stinkin' cute) is that they open! Yes, they open and there's room in there for a picture or little message. The door closes securely with a little magnet in the inside. What would you put inside it?
I love the fibers in this necklace, I was trying to create a "foresty" look.

If you'd like to wear one of these little fairy door necklaces, please visit my jewelry blog:

Wednesday, October 13, 2010

Autumn Leaves Jewelry

It is in autumn that I feel very blessed to be living in Western Pennsylvania. The bright blue days of October showcase a jewel-tone parade of falling leaves carelessly floating through the air. The blazing brilliance of colors never ceases to amaze me......

A few weeks ago my mum and I went to a local quilt show and discovered a woman creating these wonderful art quilts. No doubt she was inspired by the showy array of foliage. This is a quilt she was working on.....

This is a finished quilt. She creates them with tiny snippets of fabric which has been backed with Wonder-Under. The machine quilting is random. I think it looks pretty realistic. I'd like to try my hand at one of these someday.

I think Maple trees are my favorite. The colors are just so vibrant.....the reds, yellows and oranges! This is a picture I took this weekend. I was standing in my mom and dad's drive way shooting down toward the little village of Hadley........
Plus, the Maples hold a special place in my heart because the gentle giants surrounded the house I grew up in. This is the house! There were many more Maples around the house but they had to be taken down when they got too old and rotten on the inside.
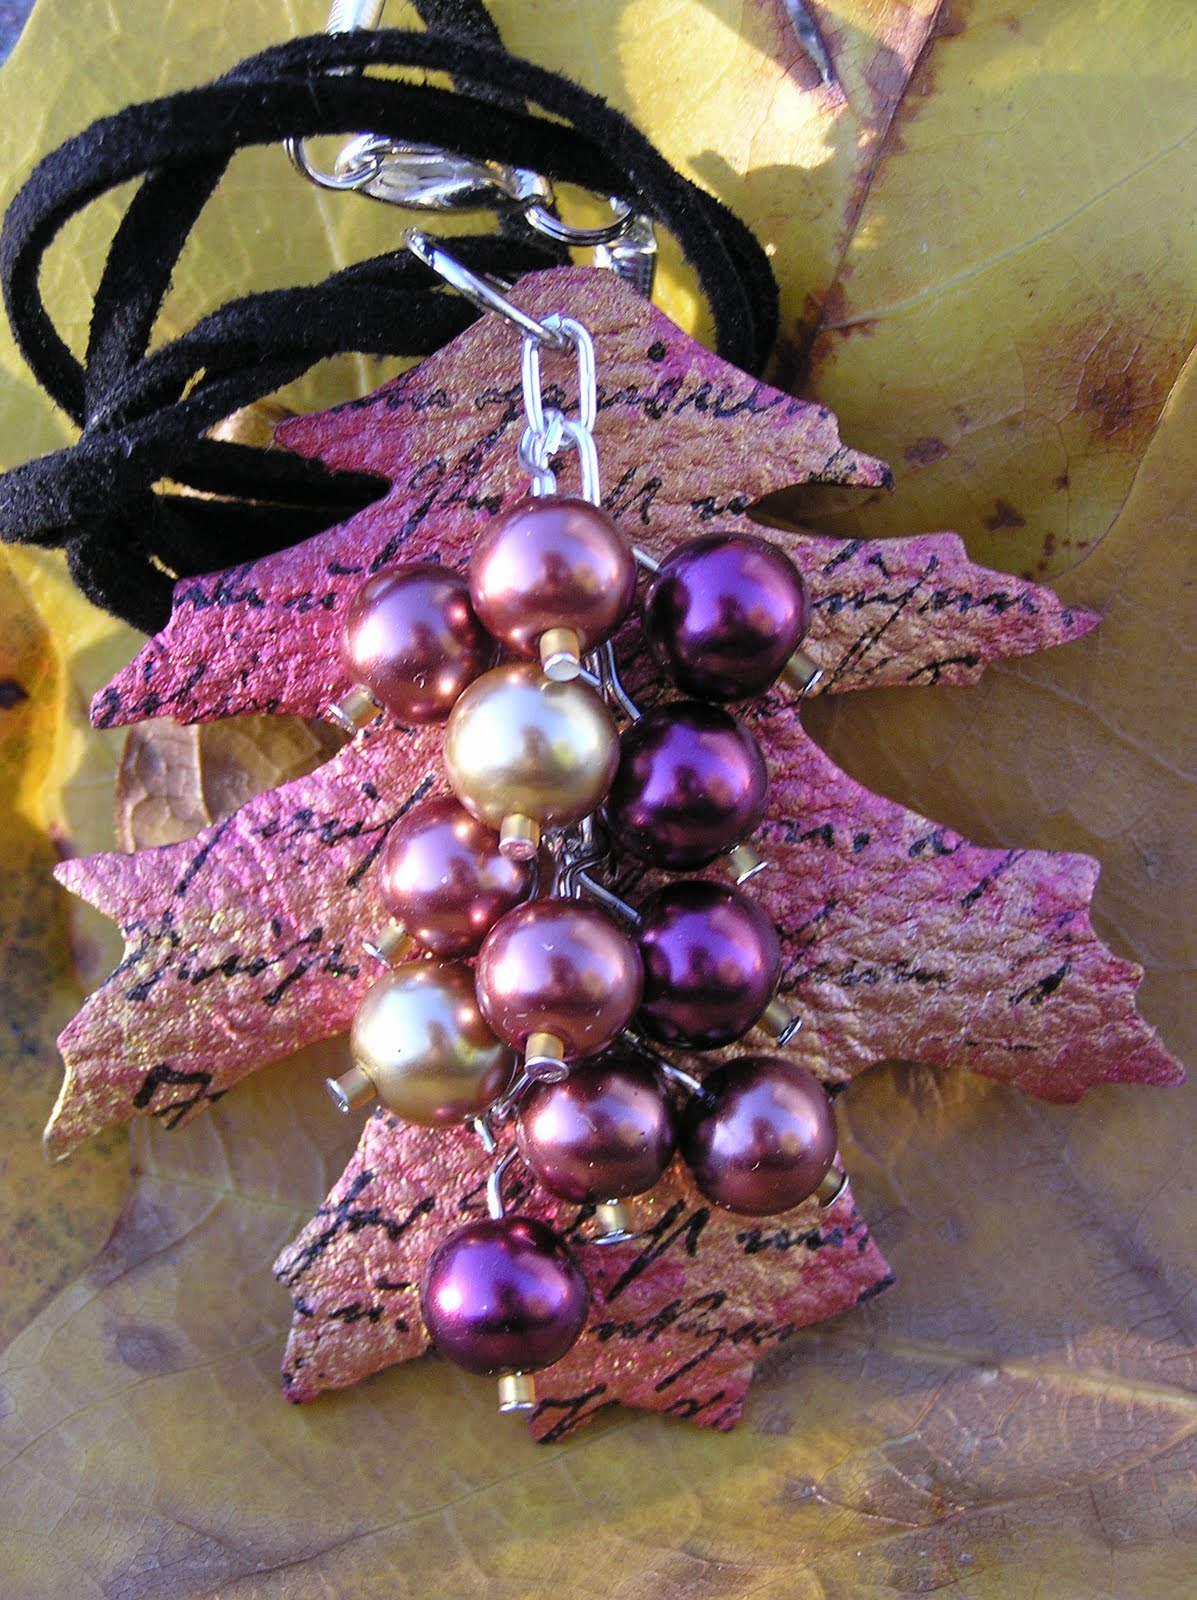
So as many of you know, I draw a lot of inspiration from nature and this is an excellent time of the year to do so. These are my new pendants I created from leather. This one has a bronze shimmer that is hard to see in this photo. The cascade of shell and stone chips is suppose to mimic falling leaves. The words on the leaf are types of trees.

This leaf has a shimmer of copper, russet and bronze to it. I made it a little steampunkie with the metal gear attached to it.

I really like how this one turned out! The cascade of iridescent pearls in dark egglant, bronze and pale gold really pop on this piece. You can find these necklaces over at Honey Girl Studio Jewelry.
How do leaves inspire you in your artistic pursuits during the autumn season? In other words, what "leafs" you inspired?