Let me introduce to you......Mitten. Tracey made this fabulous man with vintage appeal! He's all ready to go out caroling. Isn't he cute? To see more pics of Mitten head on over to Glitterbug Studios. She is becoming quite the Paperclay maven! I love the little "coal" eyes. Mitten measures 15 inches high.

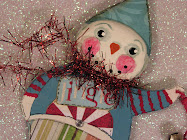
Now, let me introduce you to my little snowguy.......please say "hello" to Sugar. Sugar is made out of cream colored felt. His eyes and mouth are french knots and his nose was embroidered with a straight stitch with DMC floss. I lightly dusted the top of his head and cap with coarse white glitter. He measures 12 inches tall. 
 I was inspired to make Sugar by this glass jar full of yummy Christmas goodies. Isn't it funny how you can get an idea just by looking at a jarful of randomness?
I was inspired to make Sugar by this glass jar full of yummy Christmas goodies. Isn't it funny how you can get an idea just by looking at a jarful of randomness? So onward to the pattern. Now remember you can copy and save this pattern for your own use and even make little snowmen to sell, shoot you can even resize it and make little itty bitty ones or giant ones, but please don't sell the pattern because that would be very uncool and bad karma would then come your way in the form of every snowman that you try building this winter looking like a big pile of crap, and I really wouldn't want that for any of my friends in blogland!


So you're asking right about now, "where are the instruction Melissa?" I would never leave you hanging like that! Just to let you you know, I used a sewing machine with Ecru colored thread but you could just as easily hand sew too. You will be sewing on the front of the pieces which means there is no turning of things right side out!
Cut 2 bodies, 4 legs and 4 arms and 2 hats out of felt. Making french knots put on the eyes and mouth and using a straight stitch make a nose using DMC floss. Next cut out 2 little red circles and attach them to the front of the body using french knots. Pin together 2 legs and sew around the outside of them, repeat for the other leg. If you'd like use red DMC floss and a chain stitch to add stripes on his legs. Sew the arms the same way. Pin together the 2 bodies and tuck the two legs into the bottom of the body and stitch right over the legs to hold them on. Continue to stitch around the outside of body about 1/4 of an inch in from the edge and leave about a 2 inch opening on the one side to put the stuffing in (I use Polyfill). Sew the hat and put just a little stuffing in it. Lightly stuff the snowman and hand stitch up the opening. Hand sew the arms on each side. Hand sew the hat on the head at a jaunty angle. Embellish with whatever you want to add on to him!
If you make one of these babies, I'd love to see it! Send me pic and I'll put it in a future blog posting with a link to your blog. Happy Snowman making! This is a great way of making a snowman without getting your hands cold!




 Posts
Posts